Setting up a plumbing diagram for your above ground pool can be a daunting task, especially if you’re new to pool ownership. However, with the right information and guidance, it can be a breeze. In this comprehensive guide, we will provide you with everything you need to know to set up a plumbing diagram for your above ground pool, including the essential components and step-by-step instructions for installation.
Whether you’re setting up a new pool or upgrading your existing system, this guide has got you covered. From the pump and filter system to incorporating a main drain and adding a water heater, we will explain it all. Plus, we will provide tips for maintaining a clean and healthy pool, troubleshooting common issues, and extending the lifespan of your plumbing system.
Key Takeaways:
- Setting up a plumbing diagram for an above ground pool is essential for proper operation and maintenance.
- Understanding the basics of above ground pool plumbing, including the pump and filter system, is crucial for successful setup.
- A plumbing diagram consists of several components, including the skimmer, filter pump, and main drain.
- Proper maintenance and care of your plumbing system will ensure a clean and healthy pool for swimming all season long.
Understanding the Basics of Above Ground Pool Plumbing
Before diving into the plumbing diagram for your above ground pool, it’s important to have a good understanding of how the plumbing system works. The pump and filter system is the backbone of the plumbing setup and is responsible for keeping your pool clean and clear. Without it, your pool water would quickly become a breeding ground for harmful bacteria and algae.
The pump and filter system work together to circulate and filter the water in your pool. The pump pulls water from the pool through the skimmer and main drain, then pushes it through the filter system to remove any debris or contaminants. The clean water is then returned to the pool via the return jet.
There are two main types of filters used in above ground pools: sand filters and cartridge filters. Sand filters are the most commonly used and work by forcing water through a bed of sand to trap any debris. Cartridge filters use cartridges to trap debris and are easier to maintain than sand filters.
Another important component of the plumbing diagram is the salt water system, which converts salt into chlorine to keep your pool clean. This system typically includes a salt cell, control panel, and flow switch that work together to produce and distribute chlorine throughout your pool.
Overall, understanding the basic components of your above ground pool plumbing diagram, including the pump and filter system, is essential to maintaining a healthy and clean pool.
Components of a Plumbing Diagram for Above Ground Pool
When it comes to setting up the plumbing diagram for your above ground pool, several components must be taken into account to ensure that it is functioning properly. The skimmer, salt water system (if applicable), filter pump, and other accessories are the primary components of the plumbing system and play a vital role in keeping the water clean and clear.
Skimmer: The skimmer is an essential component of any above ground pool plumbing system. Its primary function is to skim the debris and contaminants from the surface of the water before it reaches the pump and filter system. This helps to prevent clogs and keep the water clean.
Salt Water System: A salt water system is an increasingly popular alternative to traditional chlorine-based systems. In a salt water system, the pool water passes through a salt cell, where it is converted to chlorine. This process helps to keep the water sanitized and eliminates the need for harsh chemicals. If you choose to install a salt water system, it will need to be integrated into your plumbing diagram.
Filter Pump: The filter pump is the heart of the plumbing system and is responsible for circulating the water through the filter and back into the pool. Choosing the right filter pump is essential to the overall health of your pool, as it determines how efficiently the water is cleaned and how quickly it circulates. When selecting a filter pump, be sure to choose one that is appropriately sized for your pool.
Other Accessories: There are several other accessories that can be added to your plumbing diagram to enhance the functionality of your pool. These include pool heaters, automatic pool cleaners, and waterfalls. When adding these accessories, ensure that they are properly installed and integrated into your plumbing system to prevent any disruptions to the water flow.
Step-by-Step Guide to Plumbing Diagram Installation
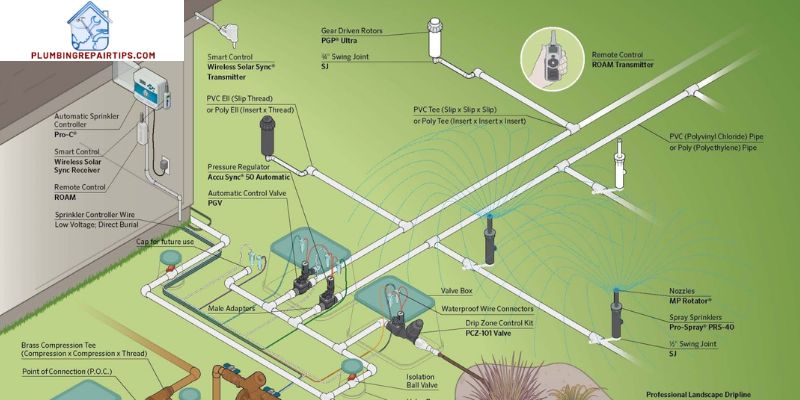
Now that you have a better understanding of the components that make up the plumbing diagram for your above ground pool, it’s time to begin installation. Follow these simple steps to ensure a smooth setup process:
- Begin by installing the pump and filter system. This is the heart of your plumbing diagram and should be installed first.
- Next, install the heater if you plan on using one. Follow the manufacturer’s instructions carefully to ensure proper installation.
- If your pool has a salt water system, install the necessary components according to the manufacturer’s instructions.
- Connect the skimmer and return fittings to the pump and filter system. These pieces are crucial for maintaining a clean and healthy pool.
- Install the main drain if your pool has one. This will aid in water circulation and drainage.
- Once all components are installed, double-check all connections to ensure they are tight and secure. Turn on the pump and filter system to check for any leaks or issues.
Always refer to the manufacturer’s instructions when installing any equipment in your plumbing diagram. Improper installation can lead to system failures or even safety hazards.
With your plumbing diagram installed, your above ground pool is now ready for use. Enjoy a refreshing swim in your crystal clear pool all season long!
Adding a Water Heater to your Above Ground Pool
If you’re looking to extend your pool season and enjoy a swim in cooler weather, installing a water heater for your above ground pool is a great option. Adding a heater to your pool is also useful for families with children who get cold easily or for those who want to use their pool for therapeutic purposes.
The first step in adding a water heater to your above ground pool is to determine the appropriate size of your heater. This will depend on the size of your pool, the desired water temperature, and the climate in your area. It’s recommended to consult with a professional to ensure that you choose the best heater for your pool.
Before installing the water heater, make sure your plumbing diagram is set up correctly and all components are in working order. The heater should be installed after the filter pump and before the return inlet fitting.
When installing the heater, follow manufacturer’s instructions carefully and make sure it is grounded properly to avoid any electrical hazards. It’s also important to ensure the heater is installed in a well-ventilated area to prevent the buildup of dangerous gases.
Once the water heater is installed, it should be connected to a thermostat or control system to regulate the water temperature. Most heaters come with built-in thermostats, but some may require an external control system.
It’s important to note that adding a water heater to your above ground pool will increase your energy costs. To offset this, consider investing in a pool cover to reduce heat loss and keep the water warm for longer periods of time.
By following these steps and taking appropriate precautions, you can enjoy a warm and comfortable swimming experience in your above ground pool all season long.
Incorporating a Main Drain into the Plumbing Diagram
A main drain is an important component of an above ground pool plumbing diagram as it facilitates the circulation of water and helps to maintain the cleanliness and hygiene of the pool. Installing a main drain is a relatively simple process and can be done alongside the plumbing diagram setup.
The main drain is typically located at the deepest point of the pool and is connected to the pump and filter system via PVC piping. The main drain functions as the primary source of suction for the pump and filter system and helps to remove debris and contaminants from the pool water.
When installing a main drain, it’s important to ensure that it is placed at the proper depth and that it is securely attached to the plumbing system. The drain should also be covered with a secure and durable cover to prevent any accidents or injuries.
It’s important to note that some states and localities may have specific regulations and requirements regarding the installation and use of main drains in swimming pools. It’s important to research and comply with these regulations to ensure the safety and legality of your pool.
Maintaining a Clean and Healthy Pool
Once you have your plumbing diagram set up for your above ground pool, it’s important to maintain a clean and healthy swimming environment for you and your family. Regular pool maintenance is crucial to ensure your pool stays sparkling clean and free of harmful bacteria.
The most important component of your pool’s maintenance is the pump and filter system. This system is responsible for circulating and cleaning the water in your pool. It’s recommended to run your pool’s pump and filter system for at least 8 hours a day to ensure proper circulation and cleaning.
Along with running the pump and filter system, you should also check and clean the skimmer and pump baskets regularly. These baskets collect debris and leaves, preventing them from entering the pump and causing damage.
Additionally, it’s important to test your pool’s water chemistry regularly. The pH balance, chlorine levels, and alkalinity should be checked at least once a week. Proper water chemistry ensures a safe and comfortable swimming environment.
Finally, brushing and vacuuming your pool regularly can help prevent algae and bacteria growth. These simple actions can make a big difference in the clarity and cleanliness of your pool.
Troubleshooting Common Plumbing Issues
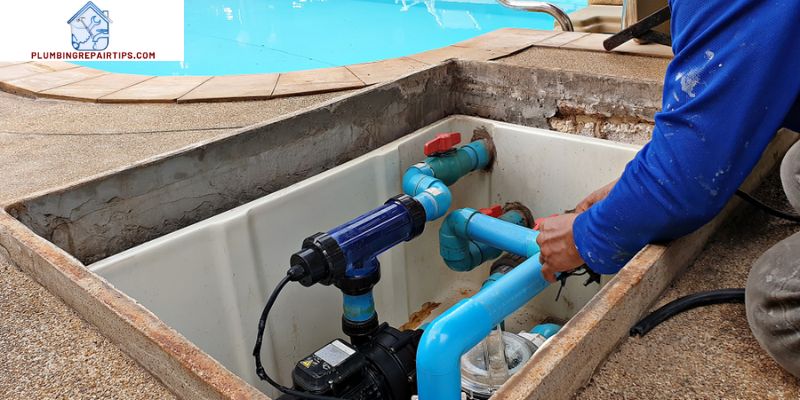
Despite proper maintenance, plumbing issues can arise in an above ground pool. Knowing how to troubleshoot and resolve these problems is essential to ensure your pool stays clean and healthy. Here are some common plumbing issues you may encounter and their troubleshooting steps:
Low Water Flow
If you notice the water flow in your pool has decreased, the first step is to check the filter and pump system. Make sure the skimmer and pump baskets are clear of debris that may be obstructing the flow. If the baskets are clear, check the filter for clogs or grime buildup. A dirty filter can impede water flow and cause low pressure.
Another possible cause of low water flow is a leak in the plumbing system. Check the pipes and fittings for any visible leaks. If you suspect a leak but can’t locate it, it may be necessary to call a professional for assistance.
Leaks
Leaks in the plumbing system should be addressed as soon as possible to prevent further damage to the pool and surrounding area. To locate a leak, start by examining the pool equipment and connections. Check the pump, filter, and heater for any visible signs of water leakage. If the equipment appears to be in good condition, inspect the pool walls and liner for any signs of damage or holes.
If you are unable to locate the source of the leak, it may be necessary to call a professional plumber for assistance.
Air in the System
If you notice air bubbles in the pool or a loss of water pressure, there may be air in the plumbing system. To remove the air, start by checking the pump lid and o-ring for any damage or wear. Tighten the lid securely and check the connection between the pump and filter for any visible leaks.
If the problem persists, it may be necessary to prime the pump. Turn off the pool system and remove the pump lid. Fill the pump with water until it reaches the halfway point, then replace the lid and turn the system back on.
By following these troubleshooting steps, you can quickly and effectively resolve common plumbing issues in your above ground pool.
Pool Heating Options for Above Ground Pools
Heating your above ground pool is a great way to extend the swimming season and enjoy your pool for longer periods of time. There are several heating options available, and each one has its pros and cons. Let’s take a closer look at some of the most popular pool heating options and how they integrate with the plumbing diagram for your above ground pool.
Heat Pump Setup
A heat pump is a popular option for above ground pool owners due to its energy efficiency and low maintenance requirements. It works by taking heat from the surrounding air and transferring it to the pool water. The heat pump setup requires a dedicated electrical circuit and plumbing connections to the pool’s filter system. The heat pump is typically installed after the filter pump and before the return line back to the pool.
| Pros | Cons |
|---|---|
| Energy efficient | Higher upfront cost |
| Low maintenance | May not work well in extremely cold climates |
| Easy to use | Requires dedicated electrical circuit |
Gas Heater
A gas heater is a popular choice for those who want to heat their pool quickly and effectively. The heater is fueled by propane or natural gas, and heats the pool water as it passes through the heater. The gas heater requires a gas line and electrical connection, as well as plumbing connections to the pool’s filter system. The gas heater is typically installed after the filter pump and before the return line back to the pool.
| Pros | Cons |
|---|---|
| Heats pool quickly | High operating costs |
| Works in any climate | Requires gas line and electrical connection |
| Easy to use | Requires regular maintenance |
Solar Heater
A solar heater is a more environmentally friendly option that uses the sun’s energy to heat the pool water. It requires a solar collector, usually installed on the roof, and plumbing connections to the pool’s filter system. The solar heater is typically installed after the filter pump and before the return line back to the pool.
| Pros | Cons |
|---|---|
| Environmentally friendly | Less effective in cloudy weather or shaded areas |
| Low operating costs | Requires solar collector installation |
| Low maintenance | May not maintain consistent water temperature |
Choosing the right heating option for your above ground pool depends on your specific needs and preferences. Consider factors such as climate, budget, and environmental impact when making your decision. And don’t forget to consult your plumbing diagram to ensure proper integration with your heating system.
Upgrading to a Salt Water System
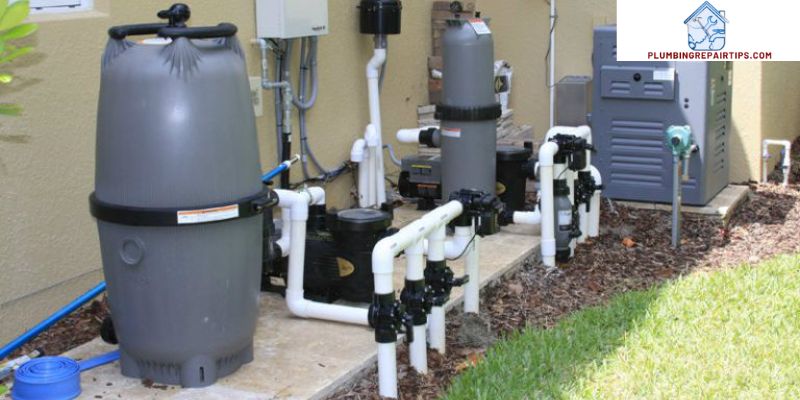
Upgrading to a salt water system for your above ground pool can provide numerous benefits, such as softer water and reduced chlorine levels. However, this upgrade does require modifications to your plumbing diagram.
The main modification needed is to switch out the standard filter pump for a salt water compatible one. The salt water system generates chlorine through a process called electrolysis, which can cause damage to a standard pump over time.
In addition to the pump, you may also need to install a salt water chlorinator, which is responsible for generating and distributing the chlorine throughout the pool. This component will need to be integrated into your plumbing diagram to ensure proper flow and operation.
It’s important to note that while the initial cost of converting to a salt water system may be higher, the long-term maintenance costs can be lower due to reduced chemical use. Plus, the softer, more natural-feeling water can be a major selling point for swimmers.
In summary, upgrading to a salt water system for your above ground pool can be a worthwhile investment. Just be sure to factor in the necessary modifications to your plumbing diagram, including the installation of a salt water compatible filter pump and chlorinator.
Tips for Extending the Lifespan of Your Plumbing System
Regular maintenance is crucial for maintaining the longevity of your above ground pool plumbing system. Follow these tips to ensure your plumbing diagram functions properly for years to come:
- Keep it clean: Ensure the area around your pump and filter system is free of debris and dirt. This will prevent clogs and leaks from occurring.
- Monitor water levels: Keep an eye on your pool’s water level and make sure it stays within the recommended range. Low water levels can cause air to get into the system, leading to damage.
- Check for leaks: Periodically inspect your plumbing system for leaks or cracks. Addressing these issues early can prevent costly damage and repairs.
- Replace worn parts: Over time, parts of your plumbing system may become worn or damaged. Replace these parts as needed to prevent further damage to your system.
- Perform regular maintenance: Follow the manufacturer’s recommended maintenance schedule for your pump and filter system. This may include backwashing your filter, cleaning the skimmer basket, and inspecting the pool’s water chemistry.
By following these simple tips, you can extend the lifespan of your plumbing diagram and ensure a clean and healthy pool for years to come.
Conclusion
Setting up and maintaining the plumbing diagram for your above ground pool may seem overwhelming at first, but with the knowledge and understanding provided in this guide, you can do so with ease. Remember to familiarize yourself with the basics of above ground pool plumbing and the components of a plumbing diagram, including the pump and filter system, skimmer, and main drain.
Follow the step-by-step guide provided in this article to ensure a smooth installation process, and don’t forget to properly care for your pool and its plumbing system to keep it clean and healthy for swimming.
If you encounter any plumbing issues, refer to the troubleshooting section for guidance. You may also consider upgrading to a salt water system or exploring different heating options for your above ground pool.
Ultimately, with regular maintenance and proper care, your plumbing system can have a long lifespan. Congratulations on taking the necessary steps to keep your above ground pool functioning at its best all season long!
FAQ
Q: What is a plumbing diagram for an above ground pool?
A: A plumbing diagram for an above ground pool is a visual representation of the pool’s plumbing system. It shows the layout and connections of all the components, such as the pump, filter, skimmer, and heater, and helps ensure proper water circulation and filtration.
Q: Why is a plumbing diagram important for an above ground pool?
A: A plumbing diagram is important because it helps you understand and visualize the entire plumbing system of your above ground pool. It provides guidance during installation and maintenance, ensures proper water flow, and helps troubleshoot any issues that may arise.
Q: Can I install a plumbing diagram for my above ground pool myself?
A: Yes, you can install a plumbing diagram for your above ground pool yourself. However, it is recommended to have some basic knowledge of plumbing and follow the manufacturer’s instructions carefully. If you are unsure, it is always best to consult with a professional.
Q: How often should I perform maintenance on my above ground pool’s plumbing system?
A: Regular maintenance is essential for the proper functioning of your above ground pool’s plumbing system. It is recommended to perform maintenance tasks, such as cleaning the filter, checking for leaks, and inspecting the pump, on a weekly or bi-weekly basis, depending on usage and environmental factors.
Q: Can I upgrade my above ground pool to a salt water system?
A: Yes, you can upgrade your above ground pool to a salt water system. However, it is important to note that this may require modifications to your plumbing diagram, specifically the filter pump. Consult with a professional or follow the manufacturer’s instructions for the appropriate steps to convert to a salt water system.
Q: What should I do if I encounter plumbing issues with my above ground pool?
A: If you encounter plumbing issues with your above ground pool, such as leaks or low water flow, it is recommended to first check for any obvious problems, such as loose connections or clogged filters. If the issue persists, consult with a professional or contact the manufacturer for further guidance.
