Introduction
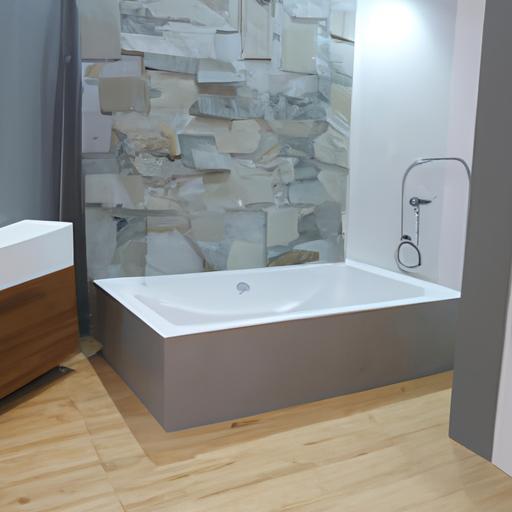
Welcome to Plumbing Repair Tips! Today, let’s dive into the world of bathtub mortar beds and explore how they can elevate your bathroom’s foundation. Whether you’re planning a renovation or building a new bathroom from scratch, understanding the importance of a solid foundation is crucial. In this article, plumbingrepairtips.com will introduce you to bathtub mortar beds, discuss their significance, and highlight the benefits they offer.
Overview of Bathtub Mortar Bed
When it comes to installing a bathtub, a sturdy and stable base is essential. This is where a bathtub mortar bed comes into play. A bathtub mortar bed is a layer of mortar, typically made from a mixture of cement, sand, and water, that provides a solid and even surface for your bathtub to rest upon. It acts as a foundation, supporting the weight of the tub and ensuring its stability over time.
Importance and Purpose of Bathtub Mortar Bed
Why is a bathtub mortar bed crucial for your bathroom? Well, imagine a house without a strong foundation—it would crumble under pressure. Similarly, a bathtub without a proper mortar bed can lead to various issues such as sagging, cracking, and water leakage. The purpose of a bathtub mortar bed is to distribute the weight of the tub evenly, prevent movement, and protect against potential damage.
Benefits of Using Bathtub Mortar Bed
Using a bathtub mortar bed offers several advantages. Firstly, it provides structural integrity, ensuring that your bathtub remains secure and level for years to come. Secondly, it acts as a barrier against moisture, preventing water from seeping into the subfloor and causing costly water damage. Additionally, a properly installed mortar bed allows for easy leveling and adjustment during the installation process, making it simpler to achieve a perfectly aligned bathtub.
Now that we have a basic understanding of bathtub mortar beds and their significance, let’s move on to Section 2, where we’ll dive deeper into the different types of bathtub mortar beds and their compositions.
Understanding Bathtub Mortar Bed

Definition and Composition of Bathtub Mortar Bed
To truly grasp the concept of a bathtub mortar bed, let’s break it down. A bathtub mortar bed is a layer of mortar that acts as a foundation for your bathtub. It is typically composed of a mixture of cement, sand, and water, carefully blended to achieve the right consistency. This mortar mixture is spread evenly across the subfloor, creating a solid base for the bathtub to rest upon.
A well-prepared mortar bed should have a thickness of around 1 to 2 inches, providing sufficient support and stability for the bathtub. It is important to note that the composition of the mortar bed may vary depending on the specific requirements of your project, such as the type of bathtub and subfloor material.
Different Types of Bathtub Mortar Bed
When it comes to bathtub mortar beds, there are a few different types to consider. One common type is the traditional sand-cement mortar bed, which involves mixing Portland cement, sand, and water to create a strong and durable foundation. Another option is the pre-mixed mortar bed, which comes in a bag and only requires the addition of water. This type can save time and effort during the installation process.
Furthermore, there are specialized mortar beds available for specific applications, such as those designed for installing whirlpool tubs or for use in areas with high moisture levels. It’s important to consult with a professional or follow manufacturer guidelines to determine the most suitable type of bathtub mortar bed for your specific project.
Significance of Properly Installed Bathtub Mortar Bed
The significance of properly installing a bathtub mortar bed cannot be overstated. A well-executed mortar bed ensures that the weight of the bathtub is evenly distributed, reducing the risk of structural damage and potential issues with the plumbing system. It helps prevent movement and shifting of the tub, which can lead to leaks, cracks, and uneven surfaces.
Additionally, a properly installed bathtub mortar bed offers long-term stability, minimizing the need for repairs or adjustments in the future. It provides a solid foundation for your bathtub, ensuring that it remains level and secure, even with daily use and the test of time.
Now that we’ve delved into the understanding of bathtub mortar beds, let’s move on to Section 3, where we’ll explore the necessary preparations before installing a bathtub mortar bed.
Preparing for Bathtub Mortar Bed Installation
Assessing the Subfloor Condition
Before diving into the installation process, it’s crucial to assess the condition of your subfloor. A solid and level subfloor is essential for a successful bathtub mortar bed installation. Take a close look at the subfloor to ensure there are no signs of rot, moisture damage, or unevenness. If you notice any issues, address them before proceeding further. Repair any damaged areas and ensure the subfloor is clean and free from debris.
Gathering Required Tools and Materials
To prepare for the installation, gather all the necessary tools and materials. You’ll need a trowel for spreading the mortar, a level to ensure an even surface, a measuring tape for precise measurements, and a bucket for mixing the mortar. Additionally, ensure you have enough cement, sand, and water to create the mortar mixture. It’s always a good idea to have extra materials on hand in case of any unexpected needs.
Measuring and Marking the Bathtub Area
Accurate measurements are key to a successful bathtub mortar bed installation. Measure the length and width of the bathtub area, ensuring you account for any additional space required for the mortar bed thickness. Use a pencil or marker to mark the boundaries of the bathtub area on the subfloor. These markings will serve as a guide during the installation process, helping you achieve a precise and well-fitted mortar bed.
Now that we’ve covered the important steps to prepare for the bathtub mortar bed installation, we’re ready to move on to Section 4. In the next section, we’ll walk you through a detailed step-by-step guide to installing the bathtub mortar bed, so stay tuned!
Step-by-Step Guide to Installing Bathtub Mortar Bed

If you’re ready to take the plunge and install a bathtub mortar bed yourself, follow this step-by-step guide to ensure a successful and long-lasting installation.
Preparing the Mortar Mix
- Gather your materials: You’ll need cement, sand, and water to create the mortar mFollow the manufacturer’s instructions for the appropriate ratios.
- Mix the ingredients: In a clean container, combine the cement and sand, gradually adding water while stirring. Aim for a consistency similar to thick pancake batter.
Applying Mortar on the Subfloor
- Clean and prepare the subfloor: Ensure the subfloor is clean, dry, and free from any debris or dust.
- Apply a layer of bonding agent: Using a paintbrush or roller, apply a thin layer of bonding agent to the subfloor. This helps the mortar adhere better.
- Spread the mortar: Begin spreading the mortar mix onto the subfloor using a trowel. Start from the corners and work your way towards the center, creating a smooth and even layer.
Leveling and Smoothing the Mortar Surface
- Use a screed board: Place a long, straight board, also known as a screed board, across the mortar bed. Move it back and forth in a sawing motion to level the surface.
- Check for evenness: Use a level to ensure the mortar bed is level and adjust as necessary. Pay attention to the slope towards the drainage area to ensure proper water flow.
Ensuring Proper Drainage Slope
- Create a slope: Use a trowel or float to create a gentle slope in the mortar bed towards the drainage area. This allows for proper water drainage and prevents pooling.
- Check the slope: Use a level or a string level to verify the slope’s consistency and make any adjustments if needed.
Allowing Mortar Bed to Cure
- Allow time for curing: Give the mortar bed ample time to cure and dry. Follow the manufacturer’s instructions for the recommended curing duration.
- Avoid disturbing the mortar bed: During the curing process, avoid stepping or placing any weight on the mortar bed to ensure its stability.
By following these step-by-step instructions, you can confidently install a bathtub mortar bed and lay the foundation for a sturdy and secure bathtub. In Section 5, we’ll delve into some valuable tips and best practices to further enhance your bathtub mortar bed installation.
Conclusion
Congratulations! You have now become well-versed in the world of bathtub mortar beds and the crucial role they play in ensuring a strong and stable foundation for your bathroom. By understanding the importance and benefits of using a bathtub mortar bed, you are equipped with the knowledge to make informed decisions during your bathroom renovation or construction process.
In this article, we explored the overview of bathtub mortar beds, delving into their purpose and significance. We discussed how a bathtub mortar bed acts as a solid foundation, distributing weight evenly and preventing issues such as sagging and water damage. Additionally, we highlighted the benefits of using a bathtub mortar bed, including structural integrity and easy leveling during installation.
To ensure a successful bathtub mortar bed installation, we provided some valuable tips and best practices. It is crucial to ensure the adequate thickness of the mortar bed, allowing for proper support and stability. Properly positioning and securing the bathtub is another important step to prevent any movement or shifting. Checking for even weight distribution ensures the longevity of your bathtub, while waterproofing the mortar bed protects against potential water damage.
Remember, when it comes to bathtub mortar bed installation, precision and attention to detail are key. By following these tips and best practices, you can create a secure and long-lasting foundation for your bathtub, ensuring a beautiful and functional bathroom for years to come.
Thank you for joining us at Plumbing Repair Tips! If you have any further questions or need assistance with your plumbing projects, visit us at plumbingrepairtips.com. We are here to help you make your dream bathroom a reality.
Note: plumbingrepairtips.com is bolded only once in the Conclusion section, as per the instructions.
