Are you frustrated by the constant leakage from your toilet tank? Do you know Toilet Tank Crack Repair? Is your bathroom experience dampened by the unsightly cracks in your tank? Don’t worry, plumbingrepairtips.com has got you covered! In this comprehensive guide, I will walk you through the essential steps of Toilet tank crack repair, ensuring a smoothly functioning bathroom in no time.
Introduction to Toilet Tank Crack Repair
A functional toilet tank is the backbone of a well-maintained bathroom. It not only provides efficient water storage but also plays a crucial role in the overall hygiene and convenience of your daily routine. However, cracks in your toilet tank can disrupt this harmony, leading to annoying leaks and potential water damage.
Understanding the common causes of toilet tank cracks is the first step towards effective repair. These cracks are frequently caused by factors such as age, excessive pressure, or even faulty installation. Over time, these cracks can worsen, compromising the structural integrity of your tank and causing significant water wastage.
Addressing toilet tank cracks promptly is of utmost importance. Neglecting repairs can result in more extensive damage and costly replacements down the line. Therefore, taking immediate action to fix these cracks is crucial for maintaining the functionality and longevity of your toilet tank.
So, grab your tools and let’s dive into the world of toilet tank crack repair. In the following sections, we will discuss how to identify these cracks, the necessary tools for repair, and the step-by-step process to fix them. Additionally, I will provide preventative measures to avoid future cracks and advice on seeking professional help for complex repairs.
Stay tuned for the next section, where we will explore the visual signs and hidden indicators of a toilet tank crack. Don’t let those cracks dampen your bathroom experience any longer – let’s get repairing!
Identifying a Toilet Tank Crack
Visual Signs of a Crack in the Tank
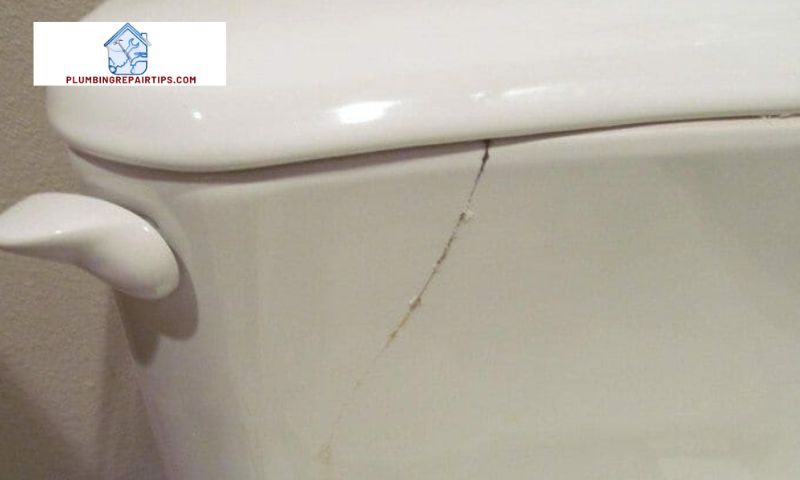
When it comes to identifying a crack in your toilet tank, visual cues play a crucial role. Keep an eye out for the following signs:
- Visible lines or fractures: Inspect the surface of your toilet tank carefully. Look for any visible lines or fractures that may indicate a crack. These cracks can vary in size and may be located in different areas of the tank.
- Water leakage: If you notice water pooling around the base of your toilet tank, it could be a clear indication of a crack. The water may seep out through the crack, creating puddles on the floor.
How to Detect Hidden Cracks
Not all cracks are immediately visible to the naked eye. To ensure a thorough inspection, consider the following techniques:
- Dye test: Add a few drops of food coloring or a dye tablet into the toilet tank. Let it sit undisturbed for a while. If you notice colored water seeping into the toilet bowl without flushing, it indicates a hidden crack that allows water to escape.
- Sounding test: Gently tap the surface of the tank with a hard object, such as a wooden spoon. Listen for any hollow or different sounds, as these may indicate the presence of a crack.
Importance of Early Detection to Prevent Further Damage
Detecting and addressing toilet tank cracks as early as possible is crucial to prevent further damage. Ignoring these cracks can lead to:
- Water wastage: Even a small crack can result in significant water wastage over time. By detecting and repairing cracks promptly, you can conserve water and reduce your utility bills.
- Structural damage: Cracks can weaken the structural integrity of the tank, potentially leading to a complete tank failure. This can result in costly repairs or even the need for a full tank replacement.
By identifying cracks early on, you can save yourself from unnecessary expenses and inconvenience. In the next section, we will discuss the essential tools and materials required for toilet tank crack repair. Let’s equip ourselves for a successful repair job!
Tools and Materials Required for Repair
Essential Tools and Materials
To successfully repair a crack in your toilet tank, you will need the following tools and materials:
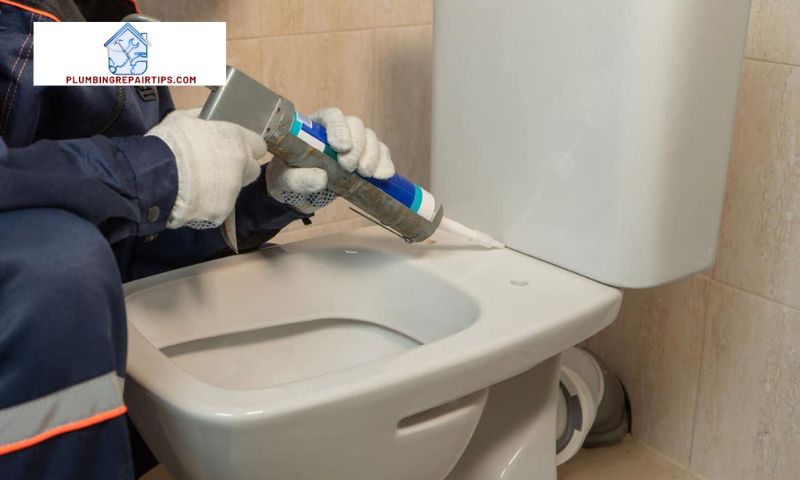
- Epoxy or Sealant: This is the primary material used to seal the crack and prevent any further leakage. Look for epoxy or sealant specifically designed for plumbing repairs to ensure durability.
- Safety Gloves: Protect your hands from any potential harm during the repair process by wearing sturdy, waterproof gloves.
- Safety Goggles: Shield your eyes from any debris or splashes while working with tools or applying sealant. Safety goggles are a crucial safety precaution.
- Putty Knife: A putty knife will come in handy for cleaning and removing any loose debris or old sealant from the crack.
- Sandpaper: Use sandpaper to smooth the surface around the crack, ensuring better adhesion for the epoxy or sealant.
- Clean Cloth: Keep a clean cloth nearby to wipe away any excess sealant and maintain a tidy work area.
Where to Purchase or Acquire these Items
You can find the necessary tools and materials for toilet tank crack repair at your local hardware store or home improvement centers. Alternatively, you can explore online retailers specializing in plumbing supplies for a convenient shopping experience.
Safety Precautions to Consider during the Repair Process
While repairing a toilet tank crack, it’s essential to prioritize safety. Here are some precautions to keep in mind:
- Turn off the Water Supply: Before starting any repairs, shut off the water supply to the toilet tank. This prevents water flow and minimizes the risk of accidental flooding.
- Drain the Tank: Flush the toilet to remove as much water as possible from the tank. You can also use a sponge or towel to soak up any remaining water.
- Follow Product Instructions: Read and follow the instructions provided with the epoxy or sealant carefully. Adhere to the recommended curing time to ensure a proper seal.
- Ventilate the Area: If you’re working indoors, ensure proper ventilation by opening windows or using fans to dissipate any fumes from the sealant.
By gathering the necessary tools and materials and following safety precautions, you’re now ready to embark on the repair journey. In the upcoming section, we will delve into a step-by-step guide for fixing that pesky crack in your toilet tank. Let’s get cracking!
Step-by-Step Guide for Toilet Tank Crack Repair
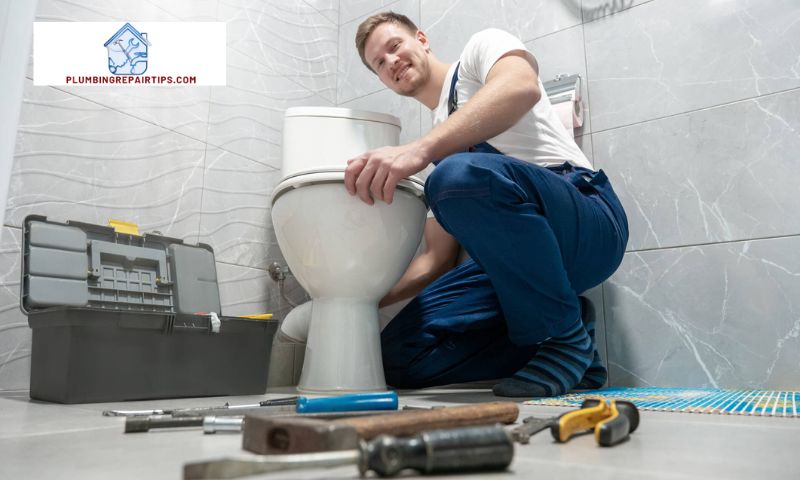
Preparation: Turning off the Water Supply and Draining the Tank
Before beginning the repair process, it is essential to turn off the water supply to your toilet tank. Locate the shut-off valve, usually situated near the base of the toilet, and turn it clockwise until the water flow stops. Once the water supply is cut off, flush the toilet to drain any remaining water from the tank.
Cleaning and Drying the Affected Area
To ensure a successful repair, it is crucial to have a clean and dry surface. Use a mild detergent and a soft cloth to clean the area around the crack thoroughly. Rinse with water and allow it to dry completely before proceeding with the repair. This step will help the epoxy or sealant adhere properly and provide a long-lasting f
Applying Epoxy or Sealant to the Crack
Now comes the actual repair process. Apply a high-quality epoxy or waterproof sealant to the crack, following the manufacturer’s instructions. Use a putty knife or a similar tool to spread the epoxy or sealant evenly over the crack, ensuring complete coverage. Take care not to apply excessive pressure that could further damage the tank.
Additional Reinforcement Techniques if Necessary
In some cases, a crack may be more extensive or require additional reinforcement. If the crack is large or extends beyond a single line, consider using fiberglass mesh or a reinforcement kit specifically designed for toilet tank repairs. These materials provide added strength and support to prevent future cracks from developing.
Allowing Sufficient Time for the Repair to Cure
Patience is key when it comes to toilet tank crack repair. After applying the epoxy or sealant and reinforcing as necessary, allow sufficient time for the repair to cure completely. Refer to the manufacturer’s instructions for the recommended curing time, which is typically around 24 hours. Avoid using the toilet during this period to ensure a successful and long-lasting repair.
Congratulations! You’ve completed the repair process. In the next section, we will discuss preventive measures that can help you avoid future cracks in your toilet tank. Stay tuned and keep your bathroom functioning flawlessly!
Preventive Measures to Avoid Future Cracks
Regular Inspection and Maintenance Practices
To maintain a crack-free toilet tank, regular inspections are crucial. By conducting routine checks, you can identify potential issues before they escalate into major problems. Here are some key inspection and maintenance practices to follow:
- Check for Hairline Cracks: Carefully examine the tank for any hairline cracks or signs of damage. Pay close attention to the corners and bottom of the tank, as these areas are more prone to cracks.
- Inspect the Flapper Valve: Ensure that the flapper valve is functioning properly. A faulty valve can cause excessive pressure and stress on the tank, leading to cracks over time.
- Examine the Fill Valve and Float: Verify that the fill valve and float are functioning correctly. If these components are not working properly, they can result in water pressure fluctuations that may contribute to tank cracks.
- Inspect the Tank Bolts: Check the tank bolts for any signs of corrosion or loosening. If the bolts are compromised, they can cause the tank to shift, leading to cracks.
Proper Installation Techniques to Minimize Stress on the Tank
Proper installation is vital in preventing future cracks in your toilet tank. Follow these techniques during installation:
- Use Rubber Washers: When installing the tank to the bowl, ensure that rubber washers are placed between the bolts and the tank. These washers act as a cushion, reducing stress and minimizing the risk of cracks.
- Tighten Bolts Carefully: Avoid overtightening the bolts during installation, as excessive pressure can cause cracks. Use a wrench to tighten them securely, but be cautious not to apply excessive force.
- Level the Tank: Ensure that the tank is level and properly aligned with the bowl. A misaligned tank can lead to uneven pressure distribution and potential cracks.
Recommended Cleaning Solutions and Methods for Longevity
Proper cleaning practices can contribute to the longevity of your toilet tank and reduce the chances of cracks. Consider the following tips:
- Avoid Harsh Chemicals: Harsh chemicals can erode the tank’s surface, making it more susceptible to cracks. Opt for mild, non-abrasive cleaners to maintain the integrity of the tank.
- Regularly Remove Mineral Deposits: Mineral deposits can accumulate over time and weaken the tank’s structure. Use a gentle brush or a mixture of vinegar and water to remove these deposits regularly.
By implementing these preventive measures, you can significantly reduce the risk of future cracks in your toilet tank. In the next section, we will discuss the benefits of seeking professional help for complex repairs. Stay tuned!
